Showing posts with label Apartment Living. Show all posts

Monday, December 15, 2014

A Fresh Take - Inspiring Workspace

After a very long drive and a long weekend of wedding stuff, I am all settled and unpacked in my beautiful childhood home. Well, mostly. I'm really loving my workspace so far, though. Would you like to see some photos? I'm hoping to stay inspired and creating! 


I'm using a portable table for my desk/worktable (craft show, anyone!?) It's still a little cluttered, but I've found a home for most of my tools.


Succulents and watercolors make me happy.


I turned my bed into a sort of couch/daybed where I can create or sleep at will. ;) Note the bowl of white lights on my shelf - I went to Goodwill to  try and find a mini lamp and ended up buying a sweater instead. Such is life.


White lights bowl, watercolor in vintage frame, teapot, bridesmaid bouquet, and a jar full of encouraging notes and memories from my friends in AR :)


The most important part of my trade! 
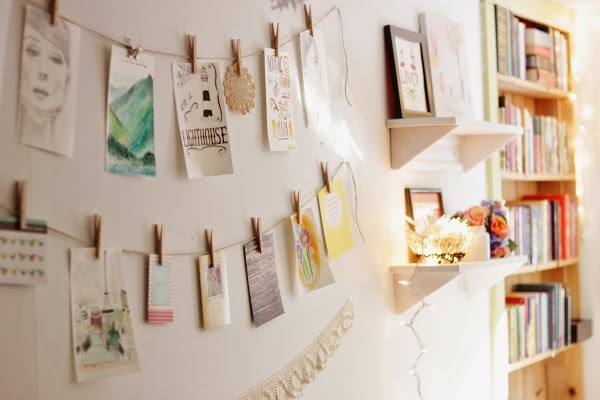

I recreated my wall of encouragement and inspiration and it looks even better now! I love my space so far. It's functional and bright and open, and sure to keep me inspired. 

On another note, I've been trying to figure out whether I actually have a name for what I do. I crochet, but I also knit, and sew, and cook, and draw, and paint, and craft. I think I'm going to just call myself a maker. A maker of things. I'll let you know if I think of something better.

Tuesday, October 28, 2014

Apartment Living Tips: Part 3


I'm back with more tips for apartment living! This is my third installment in this 'series' - I hope you find some of these ideas helpful.

Mmmm...dusty French press.
1. Save that coffee! Okay, so this isn't the most pleasant idea, but if you're short on time and money, don't waste the coffee. Make 2 cups in the morning, drink one and save the other to reheat the next morning.

2. Weekly dishes. Do you have roommates? More specifically, do you have roommates who don't enjoy doing the dishes...like, ever? Make a weekly schedule - each week it's someone's turn to take care of the kitchen. Obviously ask everyone to make an effort to clean up their own mess, but if the dishes start to pile up, it's that person's responsibility to do them.


3. Food sharing. Label your food and ask for permission before eating someone else's food! (I actually wrote on my bananas with a Sharpie this week...)


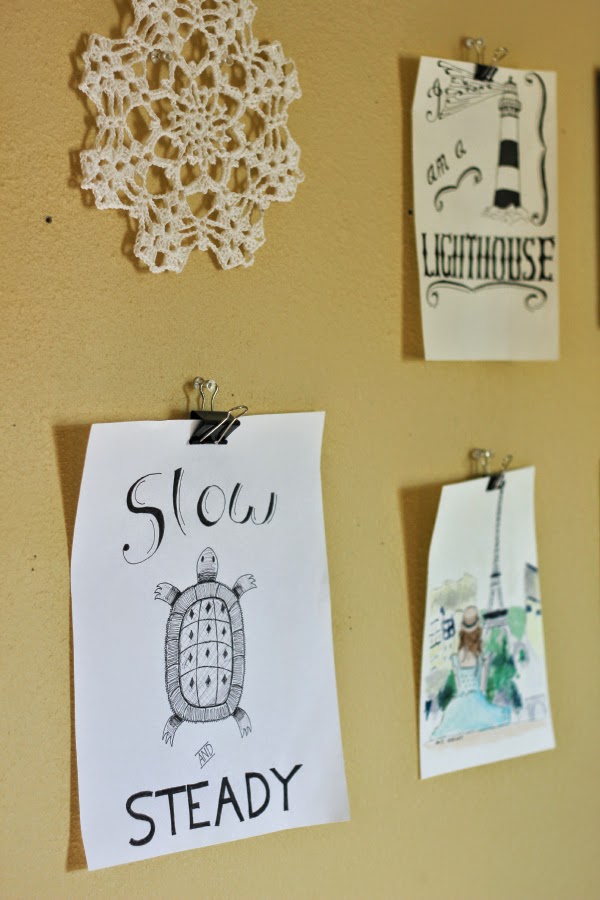
4. No more holes in the wall! Start hanging pictures with binder clips instead of nails or screws! You can see some big holes from a previous tenant in the photo above - bleh! I think I found this idea on A Beautiful Mess a while ago - I can't remember. I definitely didn't come up with it on my own, but I think it's genius. I love the industrial-yet-creative vibe of it.

Hope these little tips helped! Nothing groundbreaking - just things I've learned while living with people.

Oh yeah, one last tip: take out the trash often. And I mean often.

Tuesday, June 10, 2014

DIY Watercolor Mat Frames


I don't know about you, but I'm pretty poor. (Life of a creative, right?) I have all this artwork I want to put on the walls, but no money for frames or even a hammer and nails. At least, no money that I can justify spending on such drivel. The solution? I'm a creative, remember - obviously, make my own! 

I nearly used cardboard from a shoebox, but decided to use cardstock instead. I have lots of it and can make lots of frames for very little money. Here's how I did it!

You will need:
Cardstock
Scissors
Pencil
The artwork of your choice
Tape
Watercolors


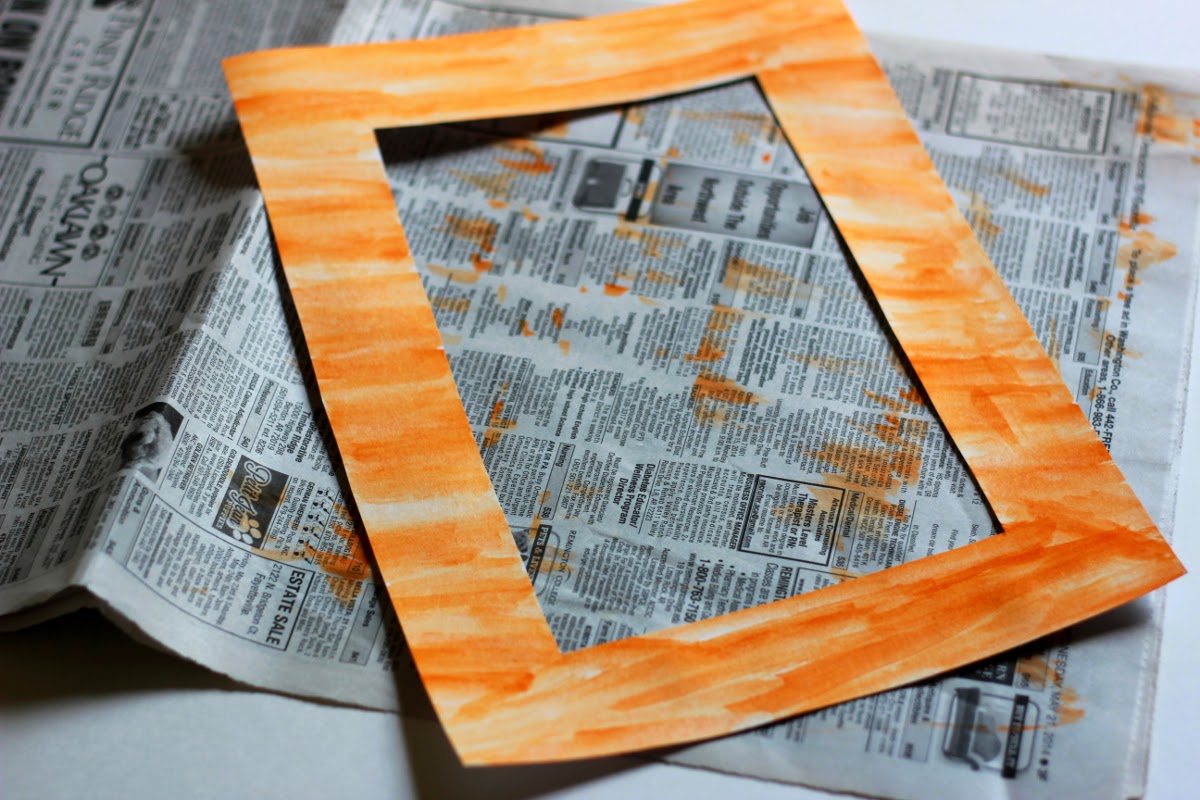
Trace your artwork onto the cardstock, about 1.5 inches in from the edge of the cardstock. You will have to trim the top of the paper, and perhaps a bit of the side. 


Next measure in 0.25 inches from the first traced line, and trace a smaller square inside the larger one.


Carefully poke a hole in the center of the cardstock, making sure not to bend or warp the paper. Cut around the smaller inside square.


Flip the frame around so that the pencil marks don't show.


Start watercoloring!


Carefully tape your artwork to the back of the frame and admire!


Monday, February 10, 2014

Home Studio Ideas

Last week I came across these posts from A Beautiful Mess on blog and business organization, and realized I needed to start some organizing of my own! It's a lot less stressful when I have posts and projects planned ahead. 

First, I got me out to Hobby Lobby looking for a dry-erase calendar, and instead I found the best thing ever: dry-erase poster board. It made a huge and amazing blog calendar, and I hung it up above my worktable using tacks and binder clips (love this idea!) So now I'm able to plan out ideas ahead of time and it's right in front of me! I love it, and it was so much cheaper than a real dry-erase calendar!

I cleared off my bulletin board and started pinning up inspiration - I want it to be a sort of mood board in the future.
I also bought myself a notebook to organize ideas. I stuck some mini sticky notes to create labels and divided the notebook into sections for different projects and blog ideas. It's already coming in handy!

And those notes and cards I had on my bulletin board? I clothespinned them to twine strung across my wall, along with a few drawings and photos. Whenever I need some encouragement, I can look at this wall and see all the words of love and care written to me by my friends and family.


I hope these photos were inspiring! My 'studio' is always a work in progress, especially since this feels so temporary. I don't feel completely settled here. Fayetteville is great, and I'm hoping to post photos from around town when things warm up a bit, but it's not historical New England with its old houses and stone wall boundaries. Miss that! If I could afford to buy my own house in NE, I would. Maybe someday I will.

Saturday, February 8, 2014

Egg Salad


Who doesn't love a great egg salad sandwich? This version is low-calorie and tasty - and couldn't be easier to whip up quick for lunchtime!

You'll need:
2 eggs
1 rib of celery, chopped tiny
1 green onion stalk, chopped teeny
Sour cream
Salt and pepper

Place the eggs in a small saucepan and cover with water. Bring to a boil and remove from heat.


Cover pan and let sit for 10 minutes. Meanwhile, chop up your celery and green onion.


When the timer goes off, run your eggs under cold water, dry off and peel. Mash the eggs in a small bowl, add celery and green onion. Add a shake of salt and pepper, and a spoonful of sour cream. (Start small with the sour cream - you want just enough to hold the mixture together, but not so much that it becomes drippy. Yuck!)


Aaaand you're done! This recipe feeds one or two people (one fat sandwich or two thin ones). 

Monday, January 13, 2014

Simple Vegetable Soup

There's nothing in this world like a steaming bowl of homemade vegetable soup.


The flavors meld together to create a bowl of comfort. Chunks of potato add a touch of savory and the carrots sweeten the broth just a tad. Add a dash of parsley for extra visual appeal and you've got yourself a terribly easy soup that is both cheap and filling!

To make this simple soup, you will need:

1/2 medium white onion, chopped
1 tablespoon of butter
Dash of garlic powder
1 tablespoon of flour
2 medium potatoes, peeled bite-size chunks
4 medium carrots, peeled and bite-sized chunks
1 can of chicken broth
Dash of dried parsley
Salt & pepper

Melt the butter in a medium saucepan over medium heat. Add the onion and garlic powder and let cook slowly, until the onion is translucent and soft. Increase the heat to medium-high and stir in the flour gradually to make a roux, scraping up the bottom of the pan. Slowly add a few tablespoons of the chicken broth, stirring constantly, to make a thick liquid. Add the rest of the broth and fill the can 3/4 full of water and add that as well. Season with salt and pepper and parsley. Toss in the carrots and potatoes and bring to a boil. Turn heat to low and cover, leaving the cover tilted so the soup can breathe. Let cook for about 45 minutes or until carrots and potatoes are soft. Approx. 4 servings.

So. Good.


Saturday, January 11, 2014

DIY Temporary Shelves


A storm was happening outside when I woke up yesterday - rain pounded against my window and I could hear thunder. The weather simply can't make up its mind in the winter here, it seems. Snowing one day, icing the next, and then a random thunderstorm comes through!

My room is now clean (daylight pictures to follow!) and mostly organized. In the midst of my frantic tossing of yarn over one shoulder and a half-finished project over the other, I realized I need shelves rather badly to help me organize at least part of my craft supplies. Having determined not to spend any money on my room project, I scoured my room and saw two shoeboxes that were perfect! They are both larger than the average shoebox, they are made of thicker cardboard, and, once decoupaged, would make a fantastic set of shelves for some lightweight storage.

This project is perfect for those of you out there who are in the same boat as me: thrifty, living in a rental or apartment, and looking for some cheap, temporary storage that doesn't look too bad (and could bring out the crafty side in you!). Here's how to make them.

You'll need: 
1., 2 shoe boxes, 2., White glue OR matte Mod Podge, 3., Paintbrush, 4., Water, and the decoupage paper of your choice (I used a mixture of newspaper and white construction paper)

How to do it:

Lay out your boxes on your newspaper and get everything ready to go!


Tear up your paper into different-sized pieces.


Coat one side of a shoe box with your glue using the paintbrush. Feel free to dilute the glue with a little bit of water to thin it out.


Start placing bits of paper on the shoe box in random order. Don't feel like you have to cover up all of the box for this first layer - you'll be filling in the blanks and layering as the project goes on.


Keep layering the bits of paper with more glue until the entire side of the box is covered. Repeat this technique for all four sides of the box, making sure to wrap some pieces inside the front to cover up whatever color the shoe box originally was (in this case lilac purple and navy blue)


Let the 'shelves' dry completely and admire!


Now you can hang them wherever you want. I used clear thumbtacks, one in each upper inner corner, to fasten my shelves to the wall. 


Now fill your shelves! Quick tip for ya: these shelves are NOT for heavy items! They are perfect for skeins of yarn, light, decorative knick-knacks and the like, but definitely not for books, glassware, etc. I chose to store my skeins of mercerized cotton in my shelves to add a pop of color to my walls (and free up much-needed storage space elsewhere). 


Cute, huh? I was really happy with the way these turned out. They added even more of a handmade flair to my room, and they were easy to make. Try decoupaging these with colorful magazine scraps, bits of tissue paper, scrapbook paper - whatever! These shelves are great for temporary spaces because they're exactly that: temporary! Meaning you can just toss them whenever you move out. Enjoy!

Tuesday, January 7, 2014

Apartment Living Tips


So I've only lived in an apartment for about 5 months now, but I wanted to share some fun tips with you that I've learned in that time.


One: Keep your counters clean (kitchen, bathroom, whatever)! They build up dust and dirt and crumbs and gross food blobs really fast, so be sure to wipe them down a few times daily with either Clorox wipes, Windex, or a kitchen cleaner. If your mom is like my mom and told you this SO many times growing up...LISTEN! She knows what she's saying!


Two: Freeze some meals! I've done this a few times now, and let me tell you it's extremely helpful when you know you won't have time to make yourself some food before you start gobbling down the chips or crackers. Next time you make a batch of soup (I made minestrone this time), eat it for dinner, eat it for lunch the next day, and then freeze the rest in 1 or 2 cup quantities in little sandwich baggies. Then before you leave for work or school in the morning, pull out a baggie and throw it in the sink to defrost until you get home! Then it's only a matter of heating it up on the stove or in the microwave. (Here's a great make-ahead breakfast sandwich recipe you might like, too!)


Three: Take the extra five minutes (literally, five) to clean up your kitchen. Really. Be an adult and clean up your mess. You'll be happier in the long run, you won't have to rattle things around trying to find the plate you want, and best of all, your kitchen will look nice! 


Four: Organize your roommate's tea collection! (And use some with her permission). Okay, this isn't really a tip, just an opportunity to show off our massive tea collection. Mmmm.


Five: When you're done all this cleaning/organizing, make your own little photo backdrop! Mine's kind of dumb, but it was fun tacking pieces of tissue paper to the wall. Looks cool in black-and-white too, I guess. 

And there you have it! Some quick little tips from the newbie apartment tenant. I hope you enjoyed them.